
Showing posts with label costume. Show all posts
Showing posts with label costume. Show all posts
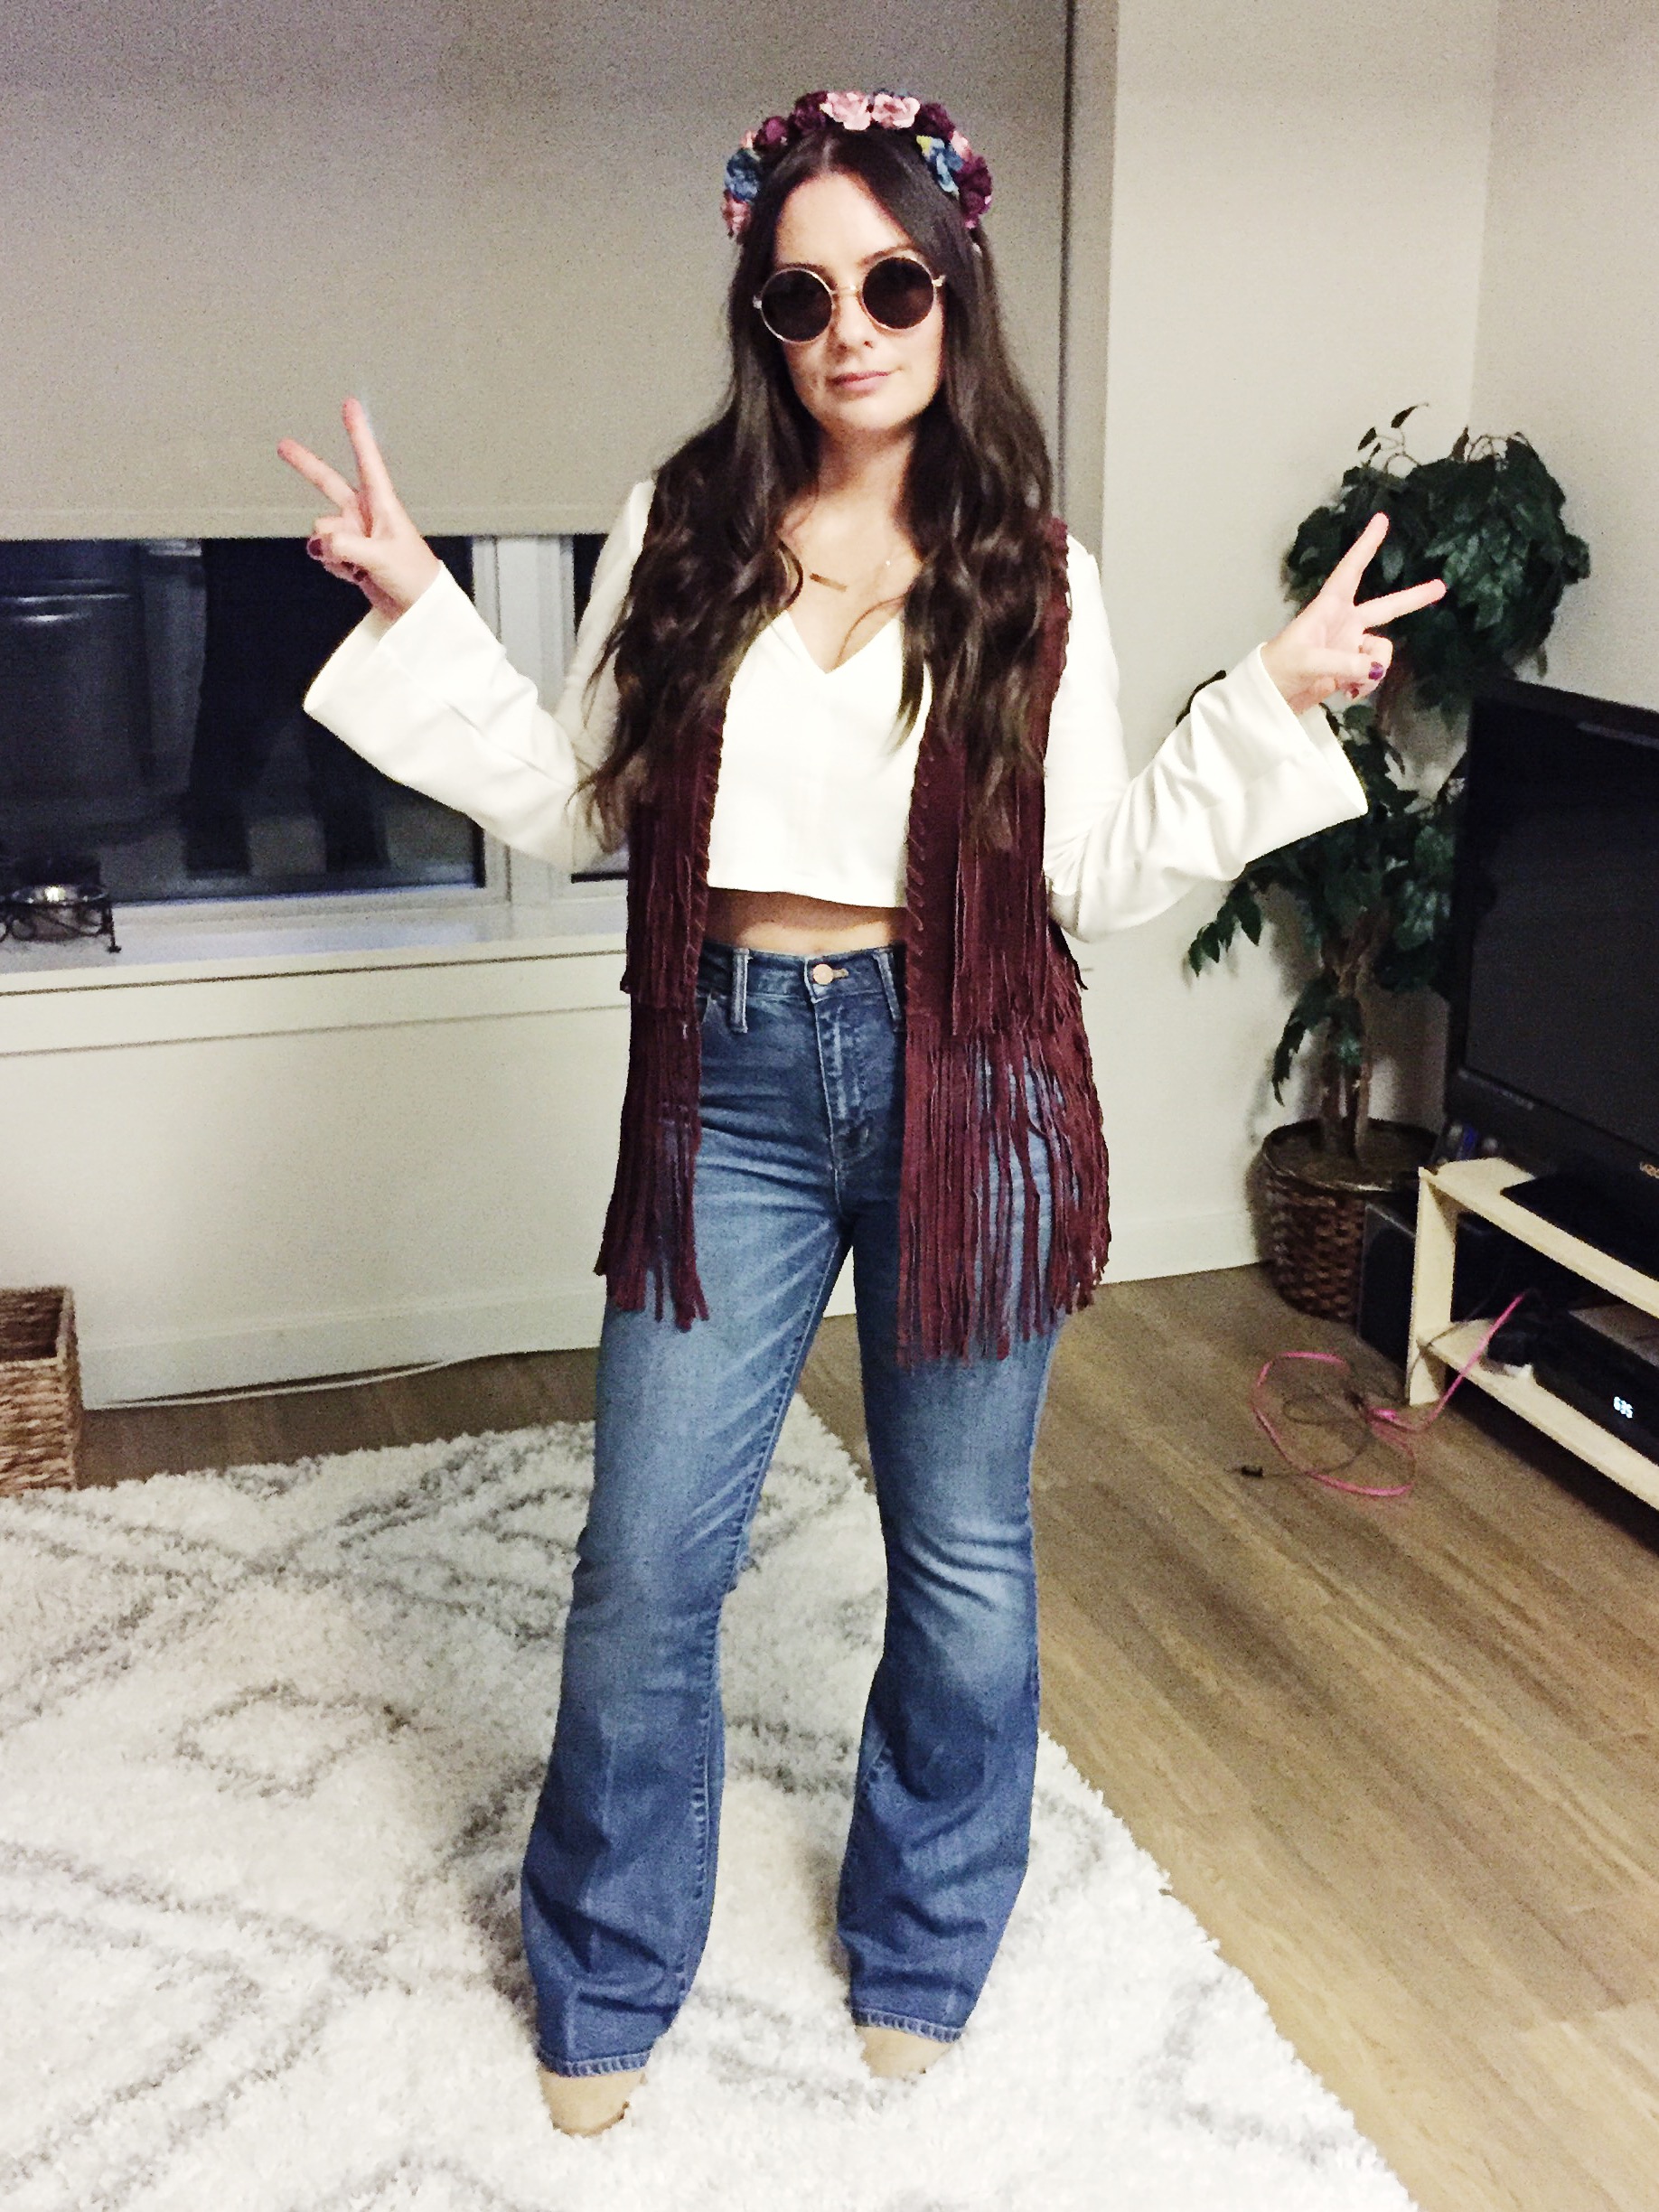
I hope everyone has a groovy Halloween!


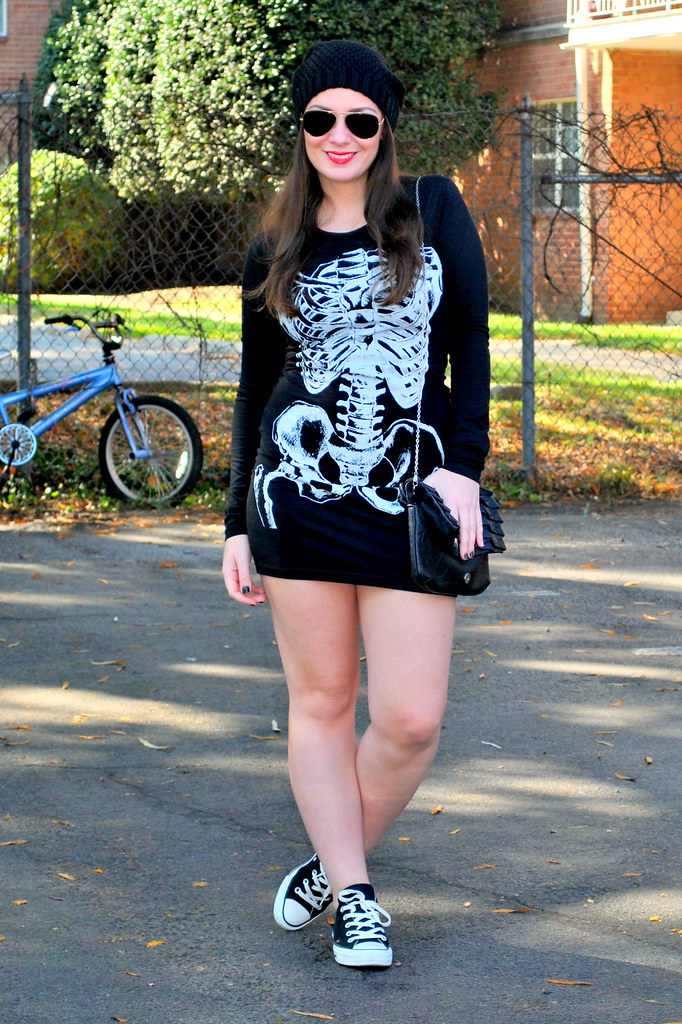
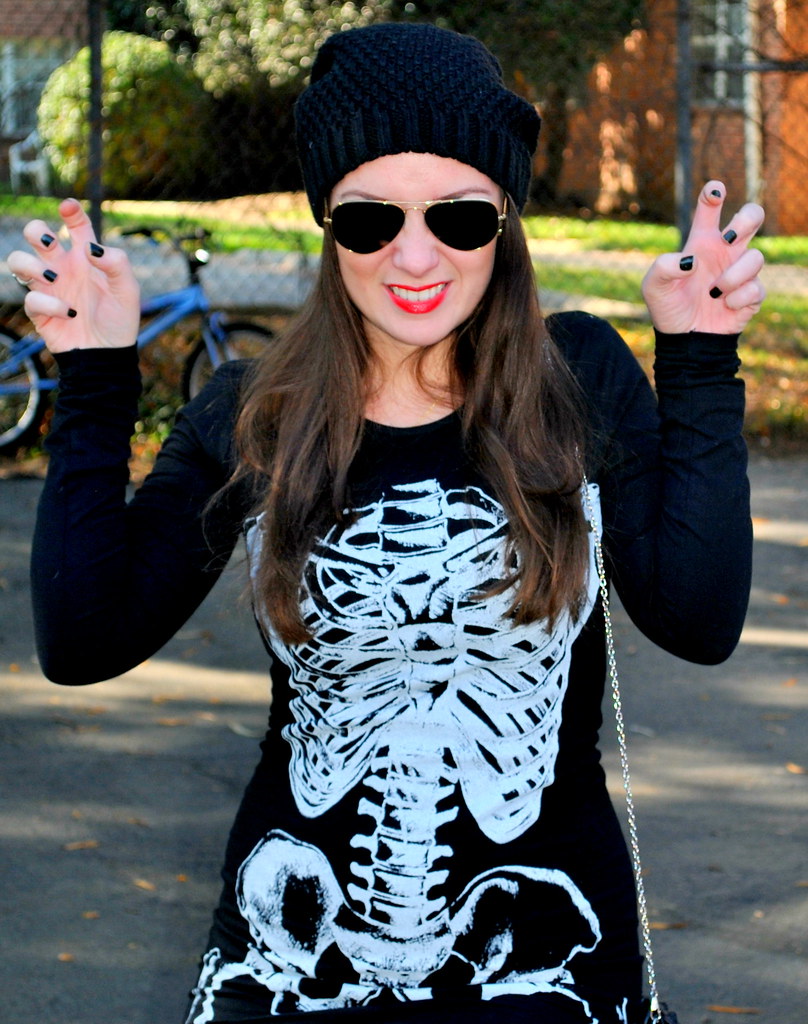
The deets: ASOS skeleton dress (similar; sweatshirt style); Converse sneakers; BCBG Generation beanie (similar); Ray-Ban sunnies (prescription); Piperlime clutch; Giorgio Armani "Four Hundred" lipstick.
Never a fan of the "costume in a bag" route, I opted for something a little less obvious this year (on real Halloween that is - I dressed up as crazy Amanda Bynes last weekend for the DC 101 party at Clarendon Ballroom which is a whole other story). The dress is just a weeee bit tighter than I had imagined when I ordered it (even ordering a size up - I just never seem to get the euro size conversion right at ASOS it either ends up being too big or too small), so I guess I'm a sassier skeleton than originally intended. I NEVER usually show this much leg (because frankly they are my least favorite body part) but I have no plan B so Skankeletonville, here I come.
Currently Coveting is also on Twitter, FB, Instagram, Bloglovin, and Pinterest. Collaboration and sponsorship answers here.


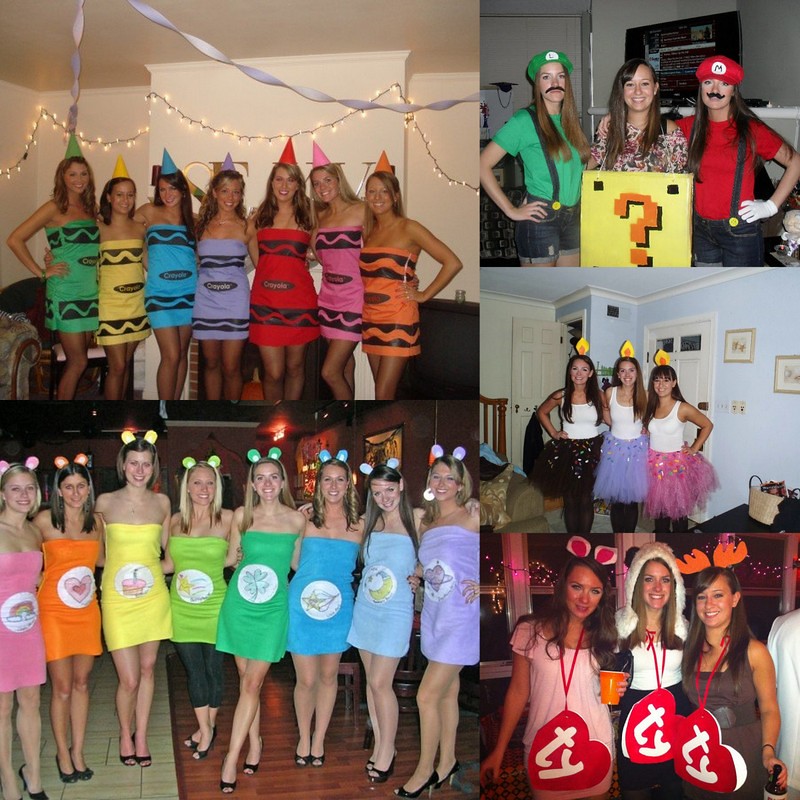
Halloween is upon us and I know I've got all kinds of costume parties coming up so I thought I would round up my favorite DIY costume projects from years past in case you were in need of a little inspiration. I'm going solo this year, but as you can tell I have been a big fan of the girl group variety. I hope you all have a fabulous weekend!
3. Care Bears
4. Cupcakes
Currently Coveting is also on Twitter, FB, Instagram, Bloglovin, and Pinterest. Collaboration and sponsorship answers here.


Happy Halloween! I hope you all had a blast this past weekend getting into this spooky holiday, I know I did. This year's costume required by far the least amount of effort in comparison to years past. I just don't have as much free time as I used to, but they seemed to carry instant recognition and the possibilities are endless. Just pick an animal, Google their tag information and you've got yourself a costume. We decided on "Squealer" he pig, "Manchu" the panda bear, and "Chocolate" the moose.
Since today is the real Halloween and I am far to old to be trick-or-treating I will be spending my night attempting some creamy pumpkin soup and searching for one of my favorite Halloween movies, "The Nightmare Before Christmas". I wish I lived closer to my family to see all my little cousins adorable costumes. How do you guys spend Halloween?


I got a haircut from Edward Scissor-hands, jealous?
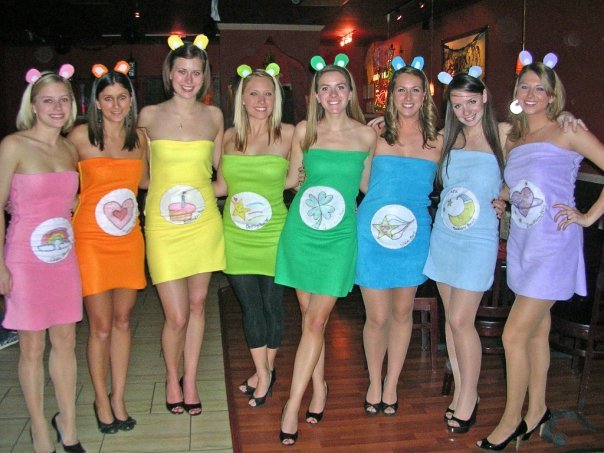

Look familiar? That’s because they are! All you need to do is follow the exact directions to make the dress from here but use fleece fabric instead (SO cozy!). Pair that with the headband instructions from here (obviously switch out a flame for two bear ears) and you’ve got yourself a whole new costume. We traced a plate to make perfect circles on pieces of felt and then had the craftiest ones of the bunch draw the pictures for our tummies. I can also attest they transition into PJ’s quite nicely as I actually ended up sleeping in mine that night (oh Halloween shenanigans…oops).


I'm starting to feel Halloween in the air and abcfamily has finally started their 13 days of Halloween movie marathon (schedule here). Hocus Pocus is on tonight and is also my favorite!
I have to say of all the costumes I have stuffed myself into over the years, this one was by far the easiest to assemble. It was also probably one of the most fun to wear because it was so comfortable, and instantly recognizable. I did spend a chunk of the night re-adjusting my moustache and picking hairs from my drink (it was well worth it but also had me wondering how guys with real ones do it every day without getting things stuck up in there?) and I can’t even count how many times I shouted the phrase “IT’S A ME, MARIO!” (aka my favorite part of this entire operation).
Supplies
Short-alls (we nabbed ours from Forever 21last year the exact ones aren’t available anymore but these are even cuter and would totally work)
Red & green t-shirts
Yellow & white felt pieces (one of each is all you need)
Black puffy paint
White gloves
Red & green newsboy hats (we got ours on Amazon)
Hot glue
Assembly
To make the hats just cut two circles from the white felt and use the black puffy paint to make either an “M” or an “L” and then glue it to the front of your hat (let black paint dry before wearing).
Cut two smaller circles from the yellow felt. Paint on four little dots to make them look like buttons and let dry. Now glue to the front of your over all hooks (after you put them on.. otherwise you can’t undo them). Everything else is pretty self explanatory.
 |
| It's a me! |


Our friend Lauren was the question box! How awesome is that?

These costumes are even easier than the crayons and who doesn’t love cupcakes? They cost very little to make and are super comfy.
What you need:
Matching white (or whatever color) tank tops for the “candle stick”
Brown opaque tights (or white if you want to be vanilla?)
A headband covered in cloth (so you can glue or sew the flame onto it)
One piece of felt in every color: red, orange, yellow, green, blue, pink, purple, & white (to make the flame and sprinkles).
Four yards of tulle in your choice color (I am chocolate here)
One yard of elastic
Small piece of cardboard
Hot glue gun/glue sticks
Flame headband:
1. Draw the shape of the flame for your head on the piece of cardboard and cut it out.
2. Trace it on your yellow felt and cut one piece for both sides and glue around the cardboard. Cut smaller orange flames and glue them onto each side as well.
3. Hot glue (or sew) the bottom of the flame to your headband and wear!
Tutu (frosting):
1. Cut your tulle into as many 6 inch wide by 3 feet long strips as it will make.
2. Lay out your elastic into a straight line. Take a strip of tulle and fold in half (lengthwise) over the elastic making an “A” shape (the elastic is the middle line)
3. Now pull the two legs of your “A” and put them under the elastic, through the top of the “A” and pull tight.
4. Do this with every strip of tulle you made, sliding the ties close together as you do it. This makes the full tutu.
5. Cut your felt into little oblong ovals for sprinkles (I did 20 of each color) and hot glue them to the tulle, make them more concentrated at the waistline and getting sparser at the bottom.
6. Now walk your “sweet” ass to that Halloween party!


Is it too early to start posting about DIY costumes, pumpkin flavored everything, and Halloween crafts? I hope not, because I can’t wait any longer. I absolutely adore Halloween and all the things that are the month of October. I been forcing my friends to make Halloween costumes by hand since college and will continue to push it until it's wildly inappropriate for me to be participating in the dress-up aspect of this holiday. Each Thursday of this month I will be revisiting some of my favorite ones and detailing how you can do them yourself. The crayon costumes below were BEYOND a big hit. Yellow crayon’s little sisters did this the year after we did they loved the idea so much. I know you have probably seen a variation of this in recent times but we did these back in 2007, when we hadn’t seen anything like it before. We executed so well, we got to bring them out for a reprise in 2009! It is important to note that all of these girls were able to make their own costumes, which should speak to how easy this really is, because minus myself and another girl or two, these ladies are not into crafts.
Also - my blog got a makeover, what do you think? (It will probably continue to tweak and change, but I hope this feels more organized)
What you will need
Needle and Thread
3 Yards of the color fabric you want to be
Scissors
Black fabric paint
Black iron on letters
Shirt transfer paper (you just put it in your home printer)
Birthday hats
Acrylic paint that matches your fabric
A sleeveless dress that you are comfortable in
12 inch zipper
Instructions
- Your fabric should come folded in half lengthwise. Make sure the folded end is the top to make it look neat and straight. Fold that in half again (so now you should have four layers).
- On top of these layers, trace the dress that you chose with about two or three inches to spare on the outline and then cut.
- Sew one side (all four layers) together. On the other side, sew starting from the bottom-up but stop when there is just enough room for the zipper to fit.
- Sew each side of the zipper on to each side of the fabric (two layers each) with the front of the zipper facing the inside of the dress you are sewing (it will be turned inside out at the end).
- Now your dress is done, so turn it inside out and try it on in case you need to make any adjustments (this is why you leave a few inches to spare so can make it smaller if needed by sewing further inside your outline).
- Paint your party hat the desired color and let it dry.
- Paint two black waves on the top and bottom along one side of the dress and let it dry. Then do the other side.
- Iron on your crayon color name with the letters to the butt.
- Print the “Crayola” trademark on your printer paper, cut and iron onto the front.
 |
| Who wishes they were a coloring book for Halloween? |
 |
| Yes, this picture looks funny. I had to remove the inappropriately named color..(it waaas college after all) |
Subscribe to:
Posts (Atom)

Social Icons