
Surprise! It’s another cupcake post (although I did warn you). This week was Mike’s & my friend Sam’s birthdays so I whipped up a batch of chocolate peanut butter cupcakes.
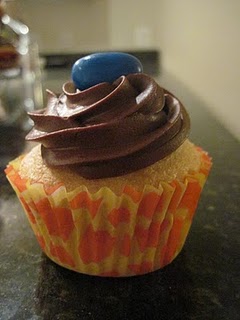
This particular flavor is tricky because there are just SO many ways to execute; PB batter + chocolate icing, chocolate batter + PB icing, or just vanilla icing blended with PB cups just to name a few. I decided on a simple combination that turned out seriously tasty - vanilla cake, peanut butter pie filing, chocolate ganache frosting, topped with a single peanut M+M.

Directions:
1. Prepare vanilla cupcakes according to box instructions.
2. For the filling combine one package of cream cheese, ½ teaspoon vanilla extract, one cup of peanut butter, and two cups of confectioners’ sugar. Set aside.
3. For the ganache chop 12 oz of good quality semi sweet chocolate and leave in a bowl. Bring 1 ½ cups heavy cream to a boil. As soon as it is boiling take it off the heat and pour over chocolate. Blend well. This can be used as a drizzle if you want, but to make the frosting I let it sit in the refrigerator for a little over an hour, added 2/3 cup confectioners’ sugar and mixed again to create the thick chocolate frosting you see here.
4. Pump peanut butter mixture into cupcakes with a piping bag and long thin tip until just a little is coming through the top, and frost with ganache (I also used a piping bag and 1M tip to frost).
5. Top with one colored peanut M+M! (the brown ones just didn’t look pretty)


Today is my boyfriend's birthday and I hope that his day is filled with happiness.

There is one song particular song that always reminds me of him. It was on a CD he made me in college right before the summer he went to study abroad. I remember listening to it and counting down the days for him to come back! So this one is for you babe. I love you, happy birthday!

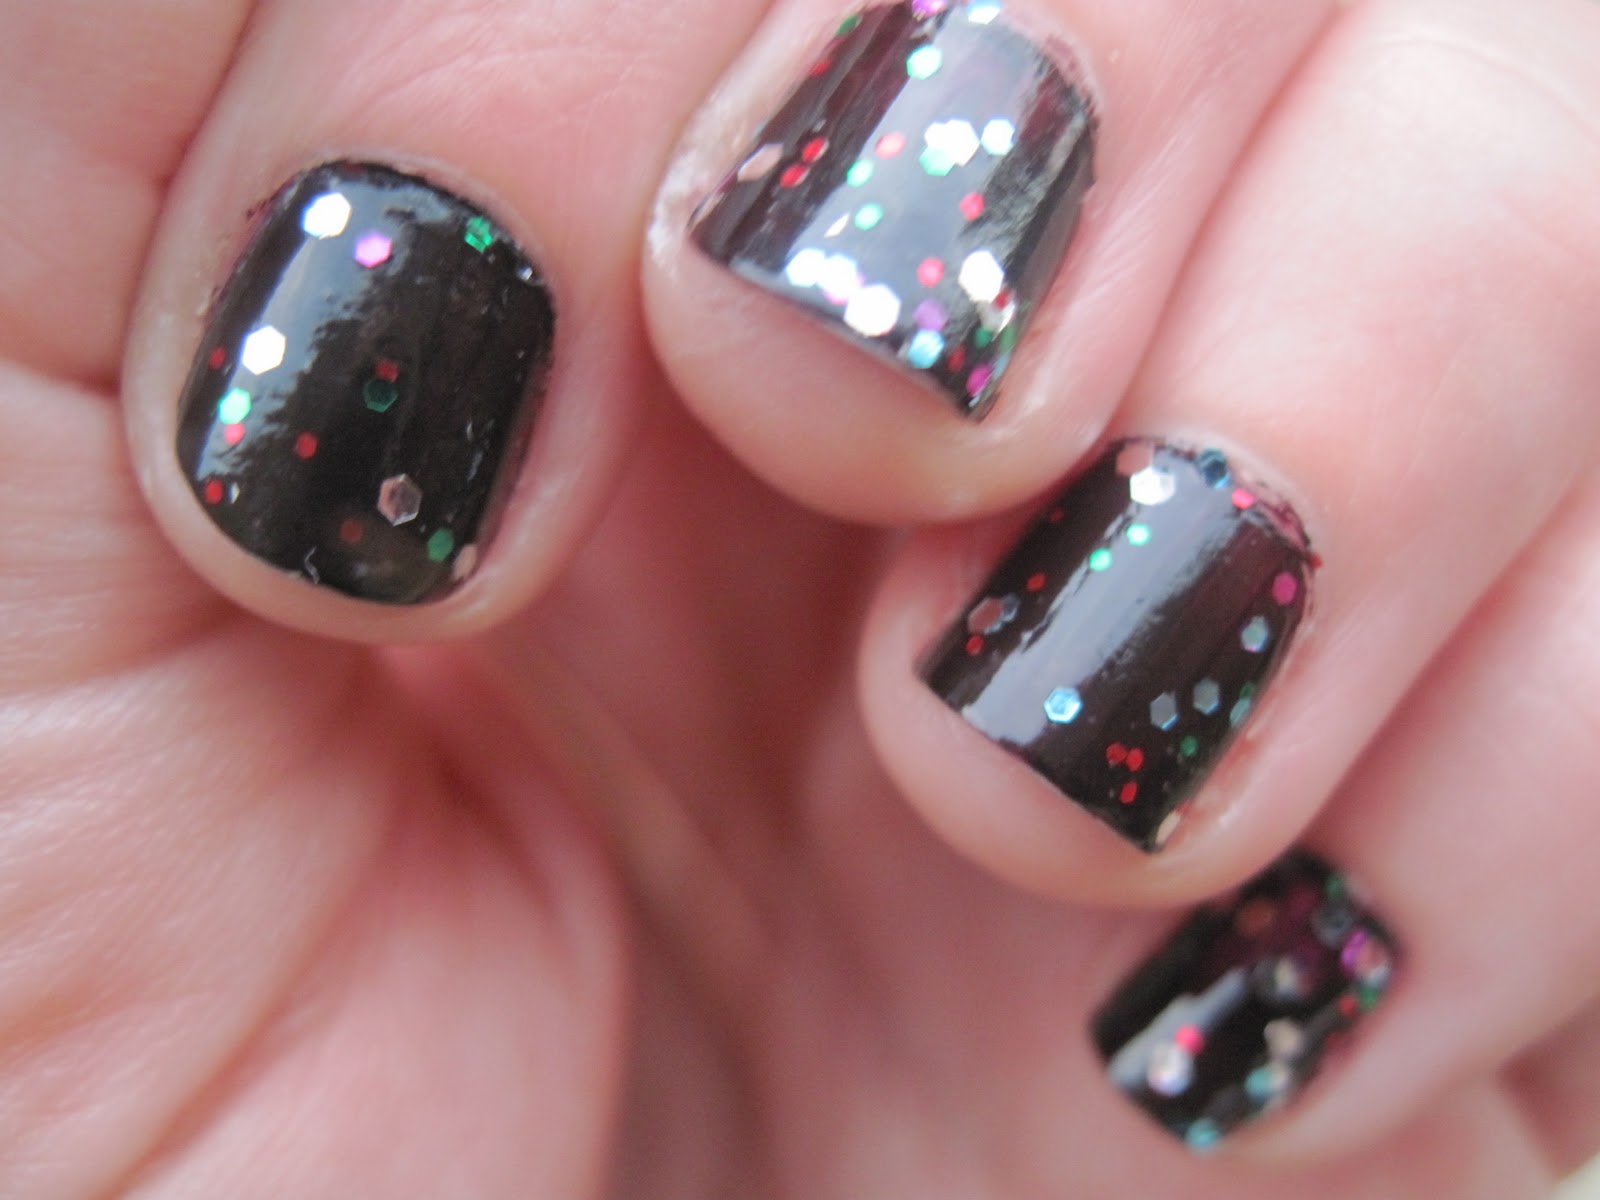
I can’t really get away with wearing sparkly apparel to my very conservative office, so as you can tell from my previous posts, I like to jazz up my nails when I can. I recently was introduced to the fabulous Deborah Lippmann brand. She has totally “nailed” sparkle polishes (haha) and I just love the colors! The problem is that they are at least $18 each and in my mind that is a major splurge on nail polish. Check out my recent discovery: Deborah Lippmann’s “Happy Birthday” is seriously similar to Wet’n’Wild’s “Party of Five Glitters” which you can find it at any convenient store for $1.99. I used ULTA Professional’s “Downtown Diva” as a base to go under the glitter. It looks like the night sky to me!


For my girlfriend Lauren's birthday this week I made mint chocolate chip cupcakes. They are such an easy spin on a staple flavor :) I am not really a lover of mint and chocolate so I had my coworkers taste them first and then the birthday girl. I got great reviews!
Ingredients
1 Box of Devil's Food Cake mix
Pudding (you can make any brand, or even buy it premade)
2 Tablespoons of peppermint extract
1 Stick of butter
4 Cups confectioners sugar
1/2 Teaspoon vanilla extract
1 1/4 Cup mini chocolate chips
3 Tablespoons of cold milk
Thin mint cookies
Directions
1. Prepare cupcakes according to box instructions and add 1 tablespoon of peppermint extract to the mix before baking.
2.After they cool for about ten minutes use a piping bag and a long thin tip to pump cupcakes with a little pudding filling. Just squeeze until a little comes out of the top like below.

3. For the icing beat one stick of butter and one cup of sugar at a time adding cold milk as you go to make the correct consistency. Add 1/2 teaspoon of vanilla extract and one teaspoon of peppermint extract and keep mixing. I added green dye for the full effect.
4. When you are finished blending, mix in the mini chocolate chips to finish.

5. Now ice cupcakes and add one 1/2 of a cookie to top it off. All done :)


Who knew it was practically manditory to wear nude shoes to a summer wedding? On top of that, how strange is it that not only are we ALL wearing nude shoes, were also ALL wearing shades of green with some blues thrown in there. Either this group of gal pals has not grown out out of the "like let's all totally coordinate what we wear to her fab wedding" phase, or we're just on the same fashion wave length and all have great taste. I would like to think it's the latter (..especially because like nobody called me about it and that would be like totally mean).
Love it!
Love it!

 |
| Notice another girl in green & nude in the background! |
 |
| We seem to be in tune with the breathtakingly gorgeous backdrop :) |

The end of summer 2011 is near (24 hours or so are left) and with that ends my love affair with orange lipstick. It's just too bright and warm to be worn in the cooler fall weather and as much as I would like to take some of those qualities with me, it's ride ends here. Below are some shots from a date night Mike and I had in Georgetown where I was rocking my (then) new J.Crew dress and favorite lip shade. R.I.P. "Orange Flip" (until next summer that is). Now I am on a mission to find a new staple! Any suggestions?


Once I got my hands on Sally Henson’s new “Salon Effects” nail polish strips a few weeks ago I was completely hooked and just couldn’t wait to put together new combinations. I got the idea in my head to pair “Kitty Kitty” strips with a red color for fall and they might be a little bit Peggy Bundy/Fran Drescher-esque but I don’t care, I feel totally FEROSH in them. They make me want to just put my paws up and start doing the Lady Gaga dance. I saw they have these adorable Halloween themed ones out right now but the CVS by my apartment was completely sold out already! They must really be catching on. Now I am on a mission to find these so if you spot them, holler at me.
 |
| O.P.I.'s "The Thrill of Brazil" & Sally Hansen's "Kitty Kitty" |


Have you ever found yourself in a situation where you need to get pretty in a hurry? Well this happened to me today when my boyfriend told me his parents were coming shortly to take us to lunch and I was sans shower or make-up. I thought others might be able to relate to this so I have detailed the steps to my quick and dirty five minute make-up application that hits all the essentials.
Below are what you will need:

- Concealer & face sponge
- Bronzer or blush & brush
- Brow shadow & brow brush
- Highlighting shadow (that matches your skin tones) and applicator
- Sheer lip balm
- Mascara
Before & After


- Apply concealer to dark areas by blotting it on with your ring finger (if you don’t have a concealer brush) then blot it with a face sponge to blend (I am way under slept these days so my trouble is under my eyes).
- Accentuate your brow line with a shadow that matches your natural brow hair to instantly frame your face and look sharp! You don’t have to buy some specialty brow kit although it can be helpful if you are new to this. All you really need is the right shadow and brush. I use Lancome’s “Mochaccino.”
- Use a shadow a few shades lighter than your skin tone on your brow bone for highlighting purposes. When you look in a mirror, try to sweep the color along the same path where the natural light hits. I am using ULTA’s “Naked” here.
- Brush the apples of your cheeks with non shimmery bronzer or blush (Bobbi Brown’s Sandstone blush seen here). I like the matte color and lightness of the blush instead of a bronzer for the everyday.
- Coat lashes with your favorite mascara. I recently found Maybelline’s Define-A-Lash and I really like it for every day application (I use the fiber/mascara combo's like L’Oreal’s Double Extend for the special nights).
- Swipe on some lip balm and you are good to go!


 |
| Chocolate Chocolate Chip Mashmallow |
 |
| Maple Bacon Toffe Marshmallow |
O. M. G.
I saw these in the Express last week and I am smitten. 240sweet.com has TONS of delish and quirky (turkey with sage dressing?) marshmallow flavors to choose from as well as gourmet cocos. I am already envisioning the things I can do with these babies. Fleur de Sel S'mores (idea stolen from their website), chocolate-covered-pretzel topped hot coco, and pumpkin pie flavored ones melting over my latte (actually I will probably just eat them right out of the bag)…I can’t wait to order these! Someone please sign me up for the marshmallow of the month membership for Christmas?


This adorable little favor was such an easy DIY project and so affordable!
1. I ordered 72 little bags from Oriental Trading. They came in packs of 24 for $6.25 each.
2. The little square stickers also came from OT for only $3.49 for144 of them! (12 sheets of 12)
3. My mom had the ribbon at home form old projects but you can buy each spool from OT for about $2.00.
4. Two (2 lb 8 oz) bags of Hershey kisses (party bag) for around $10 each.
If you include the ribbon that still comes out to 0.62 cents per favor. Aren't they awfully cute for such a little price? How-to is below.
1. Stick the sticker on the flat side of the bag.
2. Unfold and stuff with 7 kisses.
3. Take one foot of back and silver curling ribbon (each) and tie around the handles.
4. Curl ribbon by dragging the sharp end of scissors over one side the the ribbon - done :)


As you can tell from the various posts on my blog, I love DIY parties and crafts. I really love anything that enables me to utilize my creative abilities. I get these abilities from my mother. This past weekend was my parents 25th anniversary party and she put together the entire party herself. She did an amazing job but I thought I should highlight her homemade centerpieces. While the tent, tables, and linens were rented, she made these beautiful center pieces herself with a simple glass vases, foam fillers, faux flowers, and ribbon that she saved from old Coach holiday box wrapping which she also used to fancy up the champagne glasses seen here (yes she tied 70 ribbons). The accents are glass votive holders with white sand and black votive candles. The craziest part is that every single thing she used came from the dollar store!
I made the settings myself by ordering special napkins from oriental trading that have their names and their anniversary printed on them with silver utensils and black and silver ribbon to hold them all together. I also made the favors seen around the cake below which I will detail later. Check out the end result!
I made the settings myself by ordering special napkins from oriental trading that have their names and their anniversary printed on them with silver utensils and black and silver ribbon to hold them all together. I also made the favors seen around the cake below which I will detail later. Check out the end result!


Subscribe to:
Posts (Atom)

Social Icons